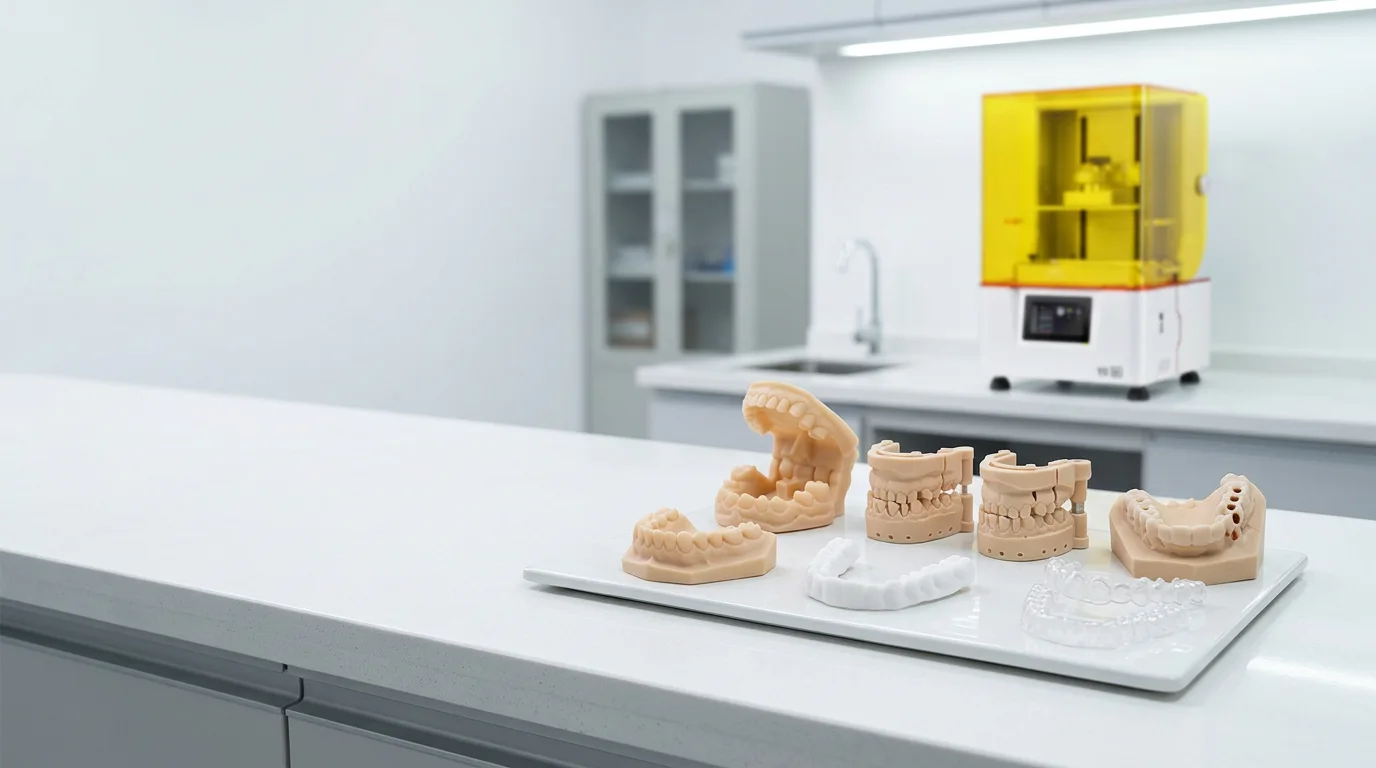
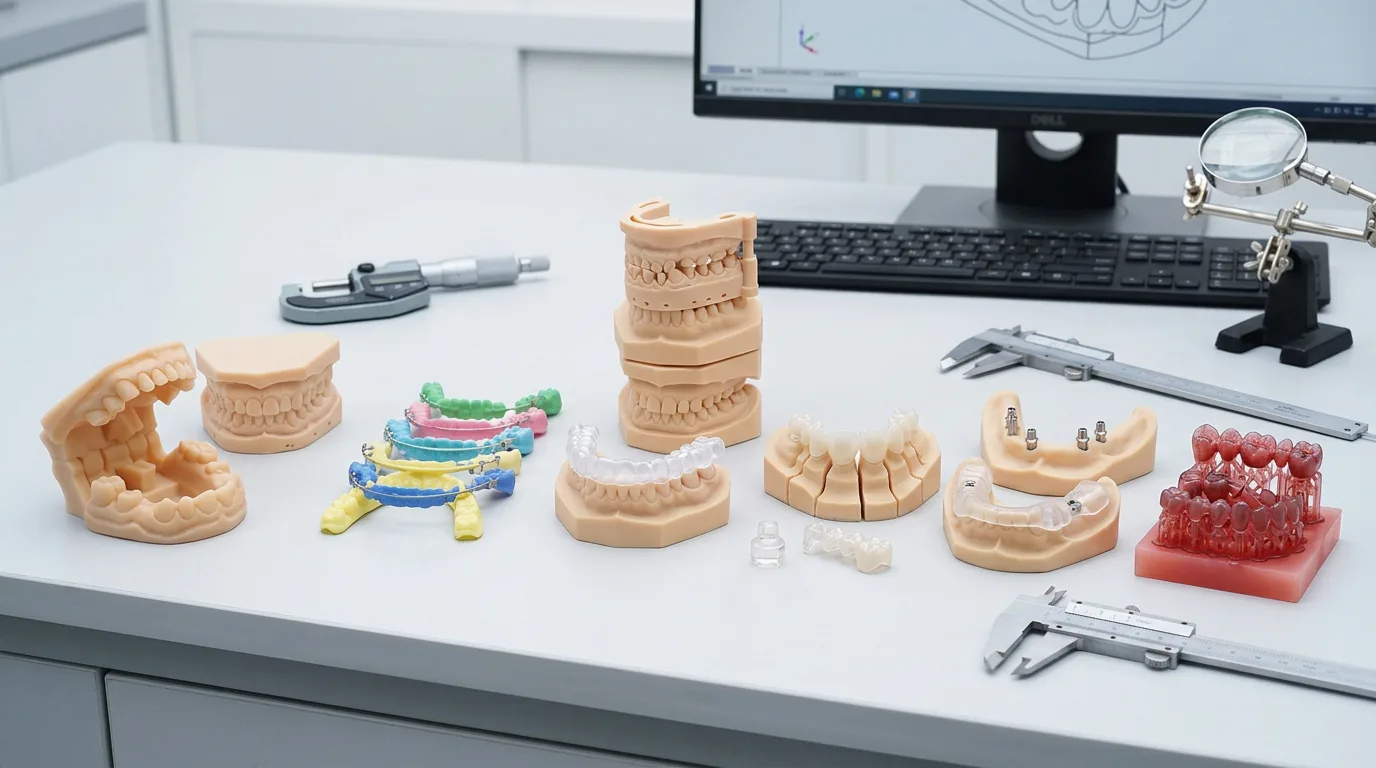
A dental 3D printer can make working dental models, orthodontic models, clear aligner working models, crown and bridge models, removable-die models, implant planning models, castable patterns, training models, and other laboratory production aids. Some systems can also produce patient-contact devices, but only when the specific resin, printer, washing, curing, and complete workflow are documented for that intended use.
That distinction matters. Being able to physically print a dental-shaped object does not mean the finished part is suitable for clinical use.
The most common things made with dental 3D printers
For many dental laboratories, the largest group of applications is not directly printed restorations. It is physical models and production aids used elsewhere in the digital dental workflow.
| What You Can Print | Typical Purpose | Important Limitation |
|---|---|---|
| Dental working models | Restoration design, fit checks, laboratory work | Dimensional requirements depend on the case |
| Orthodontic models | Study models, records, setup and treatment workflows | Model accuracy must be validated |
| Clear aligner working models | Positive models for thermoforming aligners | The printed model is not the aligner itself |
| Crown and bridge models | Restoration verification and laboratory production | Not the same as printing the final crown or bridge |
| Removable-die models | Detailed restorative workflows | Fit-related geometry should be checked |
| Implant models | Planning, analog positioning and laboratory evaluation | Not an implant or surgical guide by default |
| Castable patterns | Investment and casting workflows | Resin, burnout and investment process must work together |
| Training and presentation models | Education, communication and case visualization | Generally not patient-contact products |
| Surgical guides or oral appliances | Clinical procedures | Require application-specific materials and validated processes |
| Crowns, bridges, dentures or splints | Direct patient-contact applications | Only with materials specifically documented for that intended use |
Modern dentistry uses additive manufacturing across orthodontics, prosthodontics, implant-related workflows and other disciplines. However, published reviews also emphasize that the strength of clinical evidence varies considerably between applications.
A good way to evaluate possible applications is therefore to start with the part you need—not simply with the label “dental 3D printer.”
1. Dental working models
Dental models are one of the most straightforward uses of resin 3D printing.
A digital scan or prepared CAD file can be converted into a physical model for tasks such as morphology review, restoration planning, laboratory communication, fit evaluation and downstream manufacturing.
Depending on the workflow, this may include:
- full-arch models
- sectional models
- crown and bridge working models
- removable-die models
- opposing models
- implant-related working models
- verification models
Yidimu separates these model-production applications from direct patient-contact applications on its current dental 3D printing applications page.
The important part is not simply whether the model prints successfully. A laboratory should also determine whether important dimensions, margins, interfaces and fit-related areas remain acceptable after printing, washing, drying and UV post-curing.
2. Orthodontic models
Orthodontic laboratories can print physical models from digital dental files for study, records, setup evaluation and laboratory production.
One useful feature of a digital workflow is repeatability: once the model files are prepared, multiple different stages or variants can be produced without creating a new conventional impression for every physical model.
But repeatability should not be confused with guaranteed dimensional accuracy. Finished geometry can be affected by the printer, resin, orientation, supports, processing parameters and post-processing procedure.
This is why representative dental files are more useful for evaluating a printer than a generic demonstration object.
3. Clear aligner working models
This is where people often get confused.
A dental resin printer can produce positive dental models that are later used for thermoforming clear aligners. The printer creates the dental model; the aligner is subsequently formed over that model using the laboratory’s separate thermoforming process.
That is the workflow described on Yidimu’s current clear aligner working models page.
Directly 3D printing an aligner is a different process.
Direct-print aligner technology does exist and continues to develop. Recent research has examined its mechanical properties, dimensional behavior and clinical potential, but systematic reviews still identify areas where stronger evidence is needed. A printer or resin used successfully for orthodontic models therefore should not automatically be assumed suitable for directly printing an intraoral aligner.
4. Crown, bridge and removable-die working models
Dental laboratories can also print models used during restorative production.
For example, the printed part may reproduce prepared teeth, surrounding anatomy or removable dies so technicians can inspect a restoration or manage subsequent laboratory steps.
Again, the distinction is important:
Printing a model used to make or evaluate a crown is not the same as directly printing the final crown.
The same applies to bridges and many other restorations.
FDA information on additive manufacturing makes this application-specific approach explicit: dental materials intended for patient-contact devices are evaluated for particular intended uses rather than receiving unlimited approval for every dental application.
5. Implant planning and laboratory models
3D printing can also produce physical models used in implant-related laboratory workflows.
Possible uses include reproducing patient anatomy for planning, checking component positioning, creating models that accept appropriate laboratory components, and evaluating a proposed workflow before subsequent fabrication steps.
These models can be useful because the team can handle and inspect physical geometry rather than relying entirely on a screen.
A printed implant model, however, should not be confused with a surgical guide or an implantable component.
FDA information identifies surgical guides as an established category of additively manufactured medical instrumentation, but clinical use requires the appropriate device materials and validated manufacturing process.
6. Castable dental patterns
Dental 3D printing can replace some conventionally produced patterns used before casting.
A castable resin pattern may be printed, invested, burned out and incorporated into the laboratory’s casting process.
Possible applications depend on the actual material and downstream process.
This is one application where evaluating only the printed surface is not enough. The final result can also depend on:
- the castable resin
- pattern geometry
- support removal
- investment material
- burnout procedure
- casting process
- finishing method
A successful print is therefore only one step in a much longer workflow.
7. Training, demonstration and case-presentation models
Not every useful dental print needs to become part of a manufacturing process.
Physical models can be useful for:
- technician training
- workflow demonstrations
- anatomy visualization
- case discussion
- process development
- equipment testing
- internal production trials
These applications can also be practical when introducing a new printer or resin because teams can test file preparation, orientation, washing, curing and inspection before moving to more demanding workflows.
What about surgical guides, crowns, bridges, dentures and splints?
These products can also be produced using additive manufacturing technology. Reviews of dental 3D printing describe applications including surgical guides, crowns, bridges, dentures and various orthodontic or prosthetic devices.
But there is a major condition:
Do not decide that a resin is suitable for direct patient contact simply because it is sold as a “dental resin.”
For a patient-contact part, check the exact material’s intended use and the documentation that applies to the complete manufacturing process.
That can include:
- the exact resin product
- intended indication
- compatible printer
- approved or validated print parameters
- washing procedure
- drying requirements
- UV post-curing system and conditions
- any required sterilization procedure
- inspection requirements
- applicable regulatory requirements
FDA specifically explains that an engineered dental material cleared for one intended use is not automatically cleared for unrelated dental uses.
In practical terms, model resin should remain model resin unless its formal documentation says otherwise.
A dental printer does not determine the application by itself
If you are choosing a professional dental resin 3D printer, asking only what the machine can print is not enough.
The more useful question is:
Can this printer, material and post-processing workflow consistently produce the specific part my laboratory needs?
Consider these factors together:
| Factor | What to Check |
| Application | Exact object you need to produce |
| Model size | Full arch, sectional model, dies or other geometry |
| Batch requirement | Realistic number and arrangement of parts |
| Resin | Compatibility and documented intended use |
| Orientation | Critical surfaces and support placement |
| Washing | Procedure specified for the material |
| Drying | Condition required before later processing |
| UV curing | Material-specific curing requirements |
| Inspection | Dimensions, fit, surfaces and repeatability |
| Clinical use | Applicable material documentation and regulatory requirements |
A higher screen resolution or smaller advertised layer height cannot answer these questions on its own. Yidimu’s current printer guidance similarly recommends evaluating the entire combination of geometry, material, orientation, cleaning, curing and inspection rather than selecting equipment from one headline specification.
What should a dental lab print first when evaluating a printer?
Use one of your own representative models.
A generic calibration object can help check basic machine operation, but it does not necessarily reproduce the features that matter in your real workflow.
A better evaluation sample might include:
- your normal full-arch geometry
- thin or detailed areas you regularly encounter
- removable features if applicable
- critical fit surfaces
- the orientation you expect to use
- the resin category you plan to run
- a realistic multi-model build if throughput matters
Then process it using the intended washing, drying and curing workflow before evaluating the result.
This produces much more useful information than comparing specification sheets alone.
Evaluating the workflow with your own model
If you are deciding what a dental 3D printer can realistically produce for your laboratory, start with the application and the actual digital model.
For a sample or application evaluation, prepare:
- STL or other relevant model information
- model dimensions
- intended application
- material requirements
- expected quantity
- important surfaces or dimensions
- current printing or post-processing problem, if any
Yidimu’s dental 3D printing sample evaluation service is structured around this type of application-based review rather than assuming that one printer or resin fits every dental workflow.
The practical answer to “what can you make with a dental 3D printer?” is therefore broad—but conditional. Working models, orthodontic models, aligner molds, restorative models, implant-related models and castable patterns are established starting points. Direct patient-contact devices require another level of material qualification, processing control and regulatory verification.
Start with the part you actually need to produce, then verify the complete printer–resin–post-processing workflow around it.