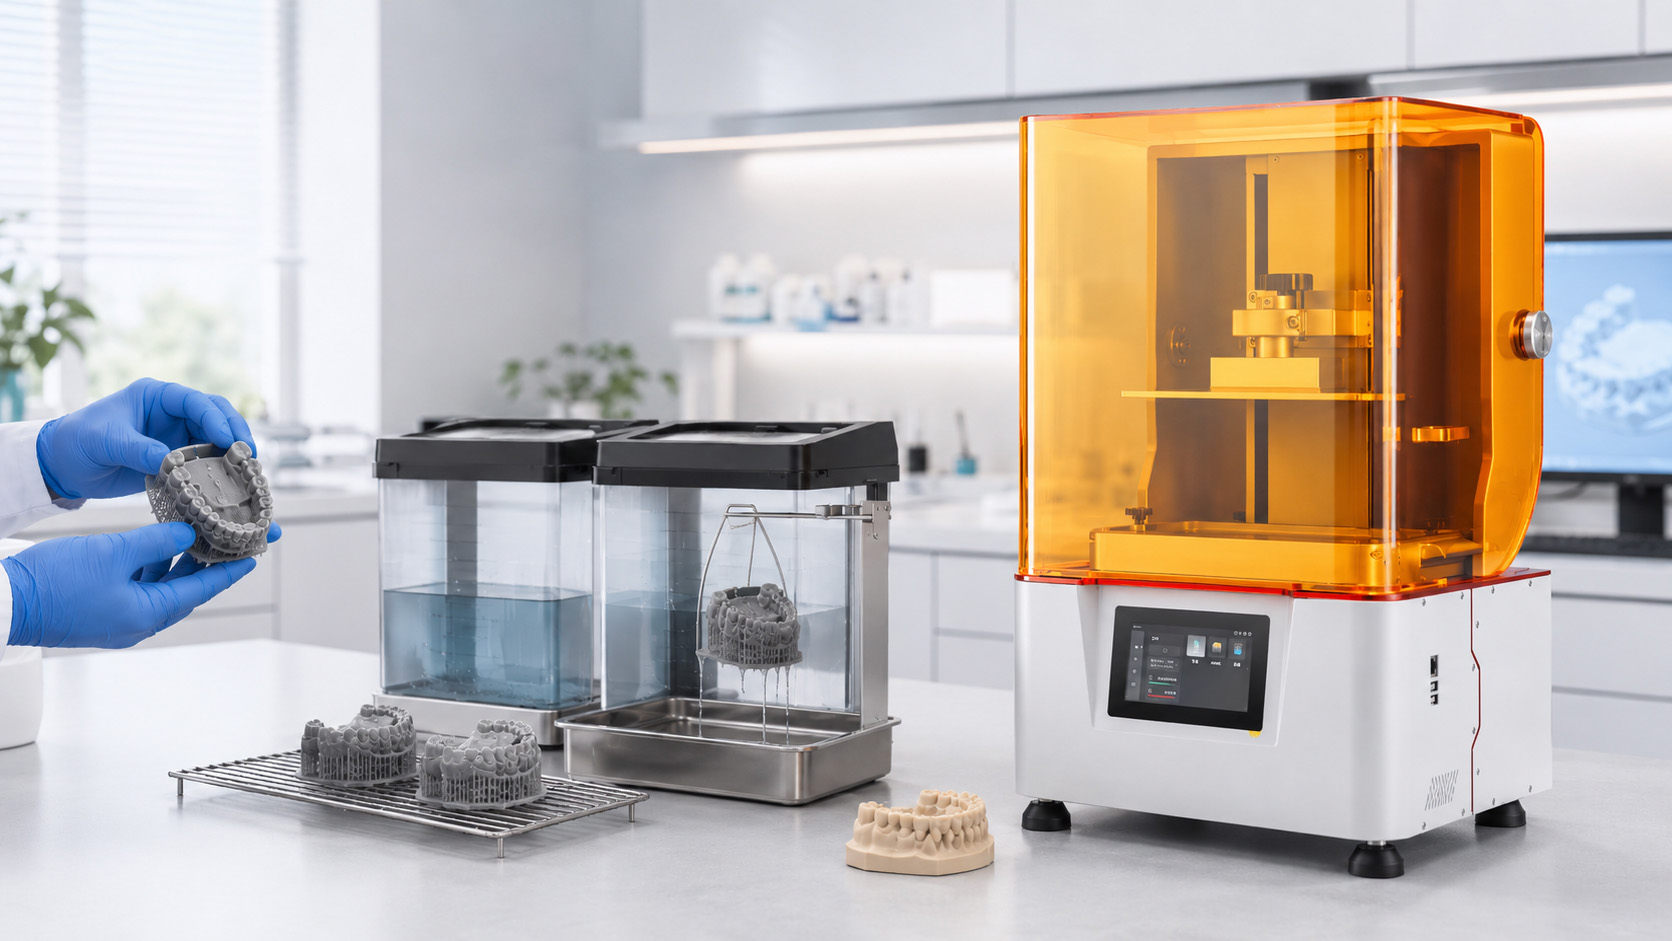
Dental Resin Washing and Curing
A controlled workflow for draining, two-stage washing, complete drying, support removal, UV post-curing, repositioning, inspection and production documentation.
Build the post-processing procedure around the identified resin and intended application—not around a universal solvent, timer or curing program.
Printing stops. Process control continues.
A part removed from a resin printer may still carry liquid resin on external surfaces, support interfaces, cavities and detailed features. That material must be handled through a defined sequence before the part is inspected or routed to its next production step.
Washing and UV post-curing are related but separate operations. Washing removes accessible uncured resin. Post-curing applies controlled light exposure under the conditions specified for the material. Drying, support removal, repositioning and inspection connect those operations into one traceable workflow.
The correct procedure can differ between a dental model resin and a material documented for a specific patient-contact device. A process that appears acceptable on a study model cannot automatically be transferred to another resin or intended use.
From the build platform to documented inspection
Resin trapped in recesses or left on the surface can become harder to remove after light exposure.
Drain the printed part
Allow excess resin to return to the designated collection area or drip tray according to the printer and material procedure. Keep the part protected from uncontrolled light and avoid contaminating clean surfaces.
Complete the first wash
Use the cleaning liquid and washing method identified by the resin manufacturer. The first bath removes the main surface load. Agitation, immersion or ultrasonic cleaning should only be used when permitted by the material and equipment documentation.
Move to a second wash
A separate, cleaner bath can remove resin transferred from the first wash. Give particular attention to model bases, internal channels, guide holes, support contacts and closely spaced features.
Dry the part completely
Let the specified cleaning liquid evaporate or drain from all surfaces and recesses. Confirm that no visible droplets remain before curing unless the applicable instructions define a different procedure.
Remove supports at the defined stage
Some workflows remove supports before post-curing; others retain them until after a partial or complete cure. Follow the resin instructions and validate the sequence against model geometry, fragile features and finishing requirements.
Apply controlled UV post-curing
Select the verified curing unit, wavelength, program, exposure condition and any required temperature based on the resin documentation. Do not transfer a program from another material solely because the parts look similar.
Reposition or flip when required
Reorient the part when the validated procedure calls for additional exposure of the base, underside, cavities or shadowed surfaces. Part placement should not block light from other items in the chamber.
Inspect the finished result
Check surface condition, residual resin, cracks, deformation, support marks, damaged margins, blocked features and other application-specific acceptance criteria. Use measuring tools only where the procedure defines the feature and tolerance.
Record and route the part
Document the material, batch, wash process, curing program, orientation, operator, date and inspection result. Route the part according to its documented intended use and the laboratory’s approved procedure.
Remove residue without guessing the chemistry
“Dental resin” describes a broad application category, not one standardized chemical formulation. Cleaning compatibility must therefore be confirmed for the exact product.
Use the identified cleaning liquid
Review the resin’s TDS, SDS and IFU before selecting water, alcohol or another specified cleaning agent. Do not assume that a liquid accepted for one resin is compatible with another.
The instructions should also determine required concentration, equipment compatibility, workspace controls, personal protective equipment, waste collection and disposal.
Separate bulk cleaning from final rinsing
A two-stage workflow helps prevent the first, resin-loaded bath from serving as the final cleaning environment. Establish a method for identifying, monitoring and replacing each bath rather than relying only on visual appearance.
- First bath for the main resin load
- Second bath for remaining surface residue
- Separate containers and tools where required
- Defined replacement or monitoring criteria
Consider geometry before setting wash conditions
Deep cavities, narrow channels, hollow models, thick support clusters and densely nested parts can retain more liquid resin than open surfaces. Wash loading, orientation and movement should allow the specified liquid to reach and leave those areas.
Excessively aggressive or prolonged washing may also affect some materials or delicate features. Use the documented starting procedure and validate it with representative parts.
Dry first. Handle supports deliberately.
Moisture or cleaning liquid left in recesses can make visual inspection unreliable and may interfere with a controlled curing procedure.
Confirm dryness across the complete geometry
Inspect more than the visible outer surface. Model bases, internal cavities, guide holes, undersides and support intersections may retain liquid after the rest of the part appears dry.
Use the drying method permitted by the material documentation. Avoid adding uncontrolled heat or compressed air conditions that have not been assessed for the resin and part geometry.
Choose the support-removal point by procedure
Removing supports while a part is relatively soft may reduce finishing work in some model workflows, but it may also deform thin walls, margins or unsupported features. Fully cured supports may require greater cutting force and can leave different marks.
Define the sequence by material, geometry, orientation, application and finishing criteria. Do not apply one sequence to every dental part.
Protect traceability during handling
Keep different materials, batches and jobs identifiable while parts move between washing, drying, support removal and curing. Prevent parts from being mixed with another case or processed under the wrong curing program.
Control exposure, orientation and inspection
UV curing is not a generic finishing step. The required exposure depends on the resin, curing equipment, geometry and documented intended use.
Match the resin to the curing system
Confirm the required wavelength, curing unit, program, exposure time, temperature condition and part preparation from the current product documentation. A visually solid part may still require a specific post-cure to reach its defined material condition.
Load the chamber for exposure—not capacity alone
Leave adequate space around parts, avoid unintended shadowing and follow the equipment loading instructions. A rotating platform can support changing exposure angles, but complex undersides or recessed features may still require documented repositioning.
Flip or reposition according to the validated cycle
Where the procedure requires it, turn the model to expose the base or other surfaces that faced away from the primary light path. Record repeated or staged exposure as part of the total curing cycle.
Inspect after the complete finishing sequence
Evaluate the part after washing, drying, support removal, curing and any permitted finishing steps. The acceptance criteria should match the model or device being produced rather than relying only on a general “looks cured” judgment.
Where each process decision should come from
Record the product-specific value actually used. Do not replace missing instructions with an assumed number.
| Process item | What must be confirmed | Primary reference |
|---|---|---|
| Cleaning liquid | Chemical type, concentration, permitted equipment, handling and disposal requirements | Resin TDS, SDS, IFU and cleaning-equipment instructions |
| Wash duration | First wash, second wash, agitation method, loading and geometry considerations | Material instructions followed by internal process validation |
| Drying | Drying method, acceptable temperature, minimum condition before cure and cavity inspection | Resin instructions and laboratory procedure |
| Support removal | Removal before cure, after cure or between staged curing cycles | Material instructions, geometry assessment and validated finishing procedure |
| UV wavelength | Compatibility between resin requirement and the curing unit’s verified output | Resin IFU or TDS and curing-equipment specification |
| Curing cycle | Program, total exposure, temperature, orientation, flipping and chamber loading | Current material and equipment instructions |
| Acceptance criteria | Surface, geometry, dimensional features, support marks, defects and intended-use checks | Approved production procedure and application-specific requirements |
| Clinical suitability | Product indication, patient-contact status, validated workflow and local regulatory requirements | Formal product documentation and assessment by qualified dental professionals |
Inspect the process before changing the timer
The observations below can have more than one cause. Review the complete printer–resin–washing–curing workflow and compare it with the applicable instructions before making a corrective change.
Resin-loaded wash liquid, incomplete second washing, liquid remaining during cure, insufficient UV exposure or an incorrect material program.
Bath condition, access to recessed surfaces, drying status, curing-unit selection, program, orientation and the resin’s current instructions.
Insufficient draining, crowded washing loads, blocked cavities, contaminated rinse liquid or inadequate movement of cleaning liquid around the part.
Part orientation, hollow areas, support clusters, first- and second-bath separation, wash loading and the permitted cleaning method.
Fragile geometry, early support removal, aggressive handling, unsuitable drying heat, prolonged washing or stress introduced during curing.
Model design, wall thickness, support strategy, removal sequence, allowed temperatures, wash exposure and curing orientation.
Thin or stressed features, unsuitable cleaning exposure, excessive curing, mechanical force during support removal or an incorrect material selection.
Crack location, part geometry, wash and cure records, support-contact points, storage conditions and the documented material limitations.
Incorrect wavelength or program, incomplete drying, blocked exposure, unsuitable chamber loading, inadequate repositioning or curing-equipment condition.
Resin-to-unit compatibility, verified program, part spacing, surface orientation, staged curing requirements and equipment maintenance records.
Excess exposure, repeated unrecorded cycles, incorrect program selection, uncontrolled temperature or use of another resin’s settings.
Total accumulated exposure, program history, chamber temperature requirements, operator records and the material-specific curing instructions.
Record the conditions that produced the part
A repeatable workflow needs enough information to compare batches, investigate defects and confirm that the correct material and post-processing cycle were used.
Build a defined UV curing station around your resin
Yidimu supplies resin 3D printing equipment, dental printing materials and UV post-curing equipment for professional workflows. Published Yidimu curing equipment includes a 405 nm UVA light source and a rotating platform. Final compatibility and curing parameters must still be confirmed for the selected resin, part and intended application.
- Light source
- Confirm against the selected resin
- Part loading
- Allow exposure around the complete model
- Rotation
- Supports changing exposure angles
- Cycle settings
- Follow the material and equipment documents
- Verification
- Inspect and record the finished result
Do not treat every printed dental part as the same product category
Dental models and production aids
Printed study models, working models, display models, fit-check models and other laboratory aids may have different material and regulatory requirements from devices intended for direct patient contact.
Their washing, curing and inspection procedures should still be defined by the selected resin, equipment and required model performance.
Patient-contact or clinical applications
Do not infer clinical suitability from the appearance of a cured part or from a general material description. Confirm the exact product indication, documented printer compatibility, validated post-processing procedure and applicable local requirements.
A dentist, dental technician or other qualified professional is responsible for confirming the specific clinical use. Yidimu is an equipment and material supplier, not a healthcare or treatment provider.
Final workflow check
Adapt this checklist to the laboratory’s approved procedure and the intended application.
Dental resin washing and curing questions
What should be used to wash a dental resin print?
Use only the cleaning liquid identified in the exact resin’s TDS, SDS or IFU. Water, alcohol and other cleaning agents are not universally interchangeable across dental resin formulations.
How long should a dental resin print be washed?
There is no single wash time for every dental resin. The required duration depends on the material instructions, cleaning method, part geometry, loading and condition of the wash liquid. Start with the documented process and validate it using representative parts.
Why use two washing stages?
The first wash receives most of the liquid resin removed from the part. A separate cleaner bath can remove residue transferred from that first stage, especially around detailed or recessed features.
Must the part be dry before UV curing?
In a typical workflow, the permitted cleaning liquid should be removed from surfaces and cavities before curing. Follow the resin instructions where they specify a particular drying method or different sequence.
Should supports be removed before or after curing?
Either sequence may be used depending on the resin, geometry and validated procedure. Removing supports too early can deform fragile features, while removing fully cured supports may require more force.
Why should a model be flipped during curing?
Repositioning can expose bases, undersides or recessed areas that did not receive the required exposure in the first orientation. Flip the part only as directed by the documented curing cycle.
Why does a washed resin print still feel sticky?
Possible factors include resin-loaded wash liquid, incomplete cleaning, retained liquid, insufficient curing, an incorrect program or a printer exposure problem. Review the complete process rather than extending curing time automatically.
Can one curing program be used for all dental resins?
No universal program should be assumed. Resin formulation, wavelength requirement, curing equipment, geometry and intended use can change the required conditions.
Does UV curing make every dental resin suitable for intraoral use?
No. Post-curing does not create a general clinical indication. Patient-contact use must be supported by the exact product documentation, compatible equipment, validated post-processing procedure and applicable regulatory requirements.
Match the printer, resin and post-cure process
Send Yidimu your dental application, model dimensions, selected resin or material requirement, expected production quantity, printer information and post-processing needs. Our team can review suitable equipment and workflow options without replacing the material manufacturer’s formal instructions.